
Already purchased new Computer with latest operating system installed and doesn’t like the default name for your Computer, then here is the simple guide which helps to rename your PC. The default name can be easily changed and new name can be given to your PC, like I have renamed as “GadgetsAcademy”.
Changing your desktop name was really simple with Windows XP, but coming to Windows 7 or 8, have to pass through couple of menus. So what are you waiting for, just follow the below steps along with respective images to rename your PC.
Steps to Rename your PC Name in Windows 8/7:
In order to change the name of your computer,
- Right-click on the computer option on the start menu or in My Computer
- Else go to Control > System, Maintenance > System.
Selecting any one of the above option we take you to the below screen. Then you’ll need to tap on Advanced System Settings present on the left side menu.
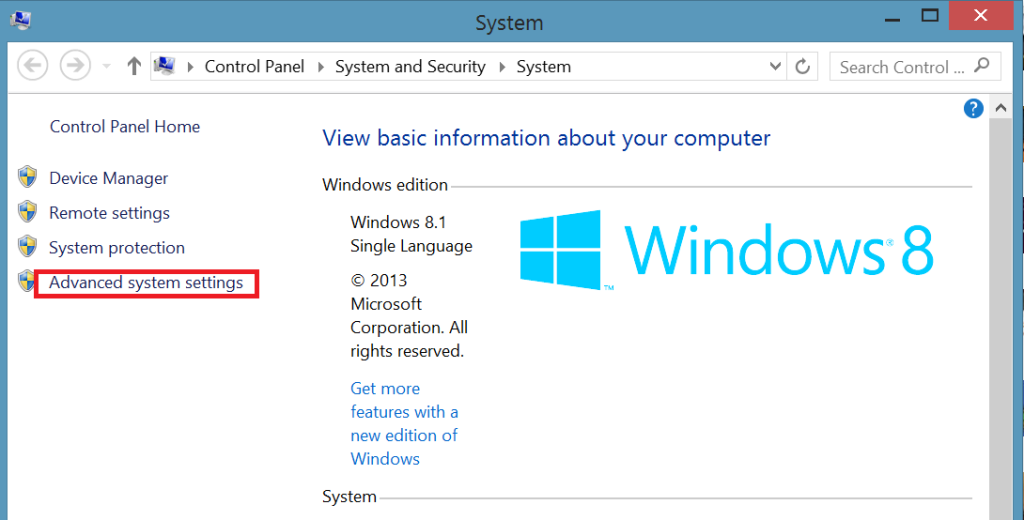
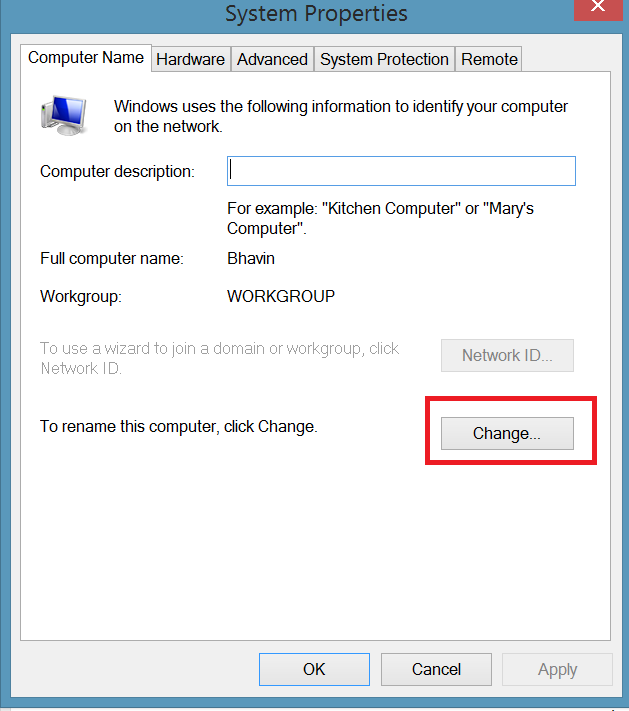
Now you will be taken to System Properties settings which gives options to alter Computer Name, Hardware, Advanced, System Protection and Remote. Select Computer Name and then “Change” present at the bottom of the screen as shown below.
Now pop-up will arises which contains the filed to enter the new name of the Computer. Here enter the name which you like to keep for the computer and then press “OK”.
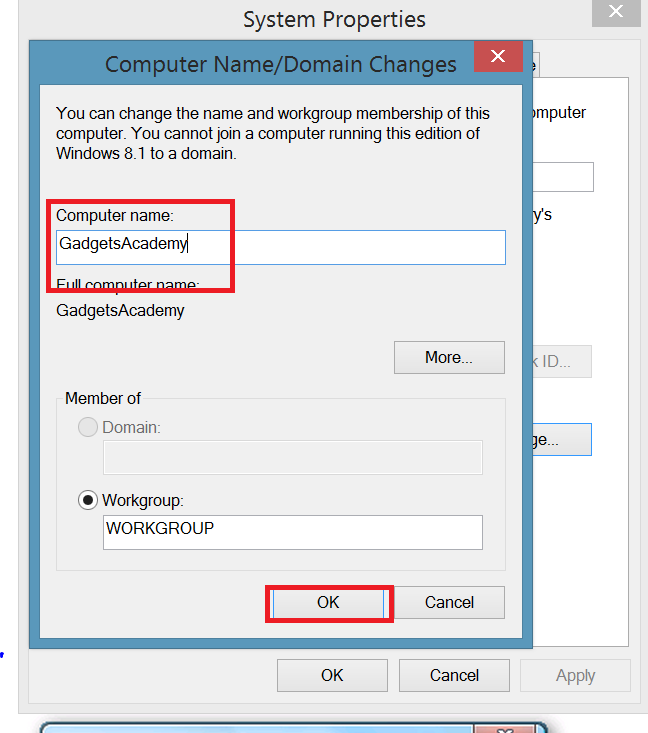
Now the Computer name is changed to your choice. Do reboot your PC to apply this changes.

